2014年11月30日日曜日

20141123 Maker Faire Tokyo 2014

今年も行って参りました。メイカーフェアー。
去年は会場がとっても狭かったけど、今年はビッグサイトで開催です!
I went to Maker Faire Tokyo 2014.
It was very small space there last year. 
But it's held at a wide exhibition hall this year.


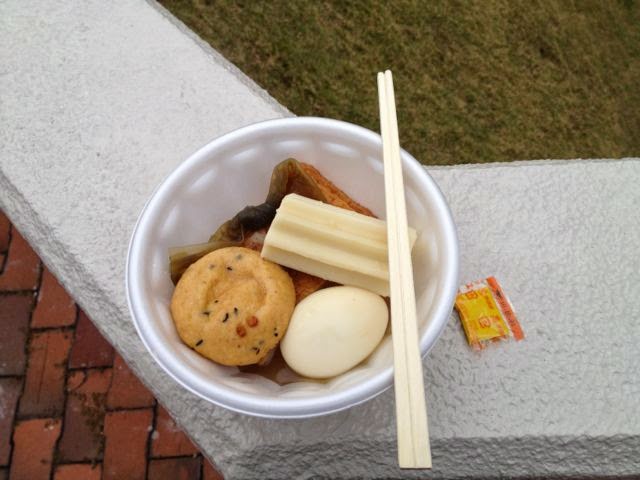
ちょっと早めに着いてしまいました。二時間前なのに、既に30人ほど並んでいます。でも、開場は12:00からなので、豆腐フェアで腹ごしらえをします。
I have arrived early. About 30 people were waiting already.
Opening is from 12:00. I went on a TOFU show to see first.

とうふマンがお出迎えです。
I greeted a TOFU man.

開場に戻ってみると、1時間前なのに凄い事になってるぞ。
あとで分かったのですが、Intelのエジソン目当ての人がかなり前から並んでいたそうです。
One hour before of opening,a lot of people visited.
Intel distributed Edison board without charge for a few people.

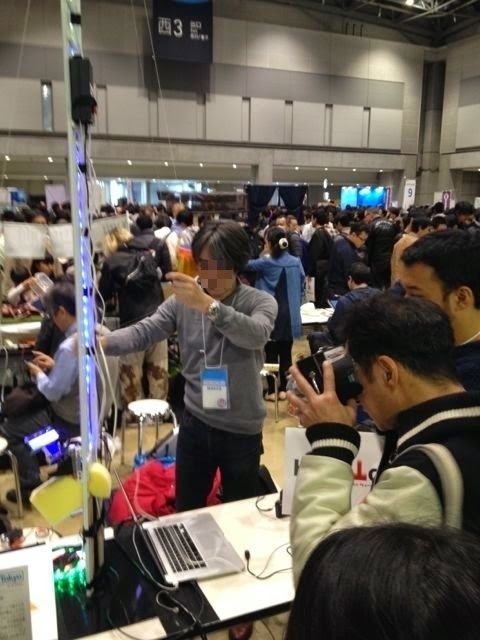
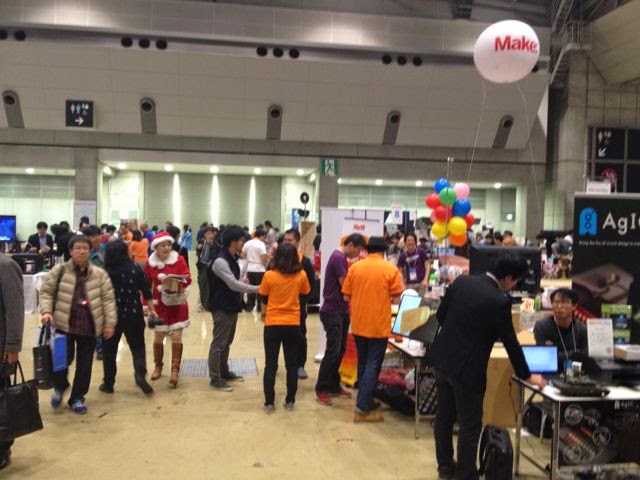
12:00に開場。まだ、人が歩けるスペースがありますが、これが午後になると、すし詰め状態になります。
I entered at 12:00.One after another, a visitor were increasing.

見る物がいっぱいあって、一日じゃ見きれません。しかも人がどんどん増えて来るので、説明を聞くのも、横に移動するのもどんどん大変になっていきます。
There was much one which takes an interest there.There are a lot of people,and it's difficult to hear the explanation.

これはフリーフォール体感マシン。この時は、マシン不調で動かず。
This is a virtual free fall machine. There was trouble in this machine.

これは、学生達の手作りパラレルリンクロボット。
パラレルリンクの動きはどこから流用したのではなく、自分たちで方程式を解いて作ったそうです。この先に半田ごてを付けて、氷を溶かして3D形状を作る予定との事。
This is parallel link robot made by students.
The formula of robot was solved by students.
They's plan is create of a ice 3D printer .

14:00からDale Dougherty氏の講演。
  • 僕たちは、自分のかゆい所を掻いているだけ。(それをシェアしてるだけ)
  • 実際に体を動かして勉強する。
  • 人生、それ自体が問題解決である。
  • これからの子供達がメーカーになる事を望む。
  • 作る事 イコール 教育。

Lecture of Mr. Dale Dougherty.
  • Scratch your own itch.
  • learn from real experience.
  • All life is problem solving.
  • Every child a maker.
  • Make = Learning


成層圏の風船から見た地球
The earth seen from stratosphere.

AgICによるインクジェット印刷の回路パターン。
これでハンダ付けできれば、最高なんだけど。
The circuit printed by Ag ink.
I hope that soldering with this ink.


ヘラクレス型テルミン。初めてテルミンを弾きました。
The Herakles type TERUMIN. I played TERUMIN for the first time.

ラズパイのビデオ出力をVHFに変換して昔のブラウン管テレビに昔の番組を映す。文章で表すと、ふーん。って感じなんだけど、なぜか実物を見ると感動する。
The old type Television showed old TV program by Raspbery Pi.

リレーによる計算機。
このブースでは、昔の計算機は本当にこんな音をしていた。と凄いコアな話で盛り上がっていた。私も十分におじさんなんだが、改めて驚き!
An electronics calculator made with magnet really.

ガルバノスキャナーによるレーザープロジェクター。米国製のスキャナなら意外と安く購入できるらしい。
An laser projector made with garbano scanner mirror.

クラウドファンディングによる、空飛ぶ自動車開発プロジェクト。
2020年の東京オリンピックの聖火台に火をつけたい。と開発中。頑張って!
project of the flying car.
It's expected to light Olympic cauldron of Tokyo Olympic Games in 2020. 

コアラのマーチを振り続けると丸くなると言う事らしい。
The shake machine of COARA's MARCH.

簡易型XYプロッタ。
Easy XY plotter.

R2D2おじさん
Homemade R2D2.

ピョコピョコ。
去年の物より格段にスムーズに動いてました。さすが。
The Pyoko Pyoko. This year's machine was working smoothly than last year's it.

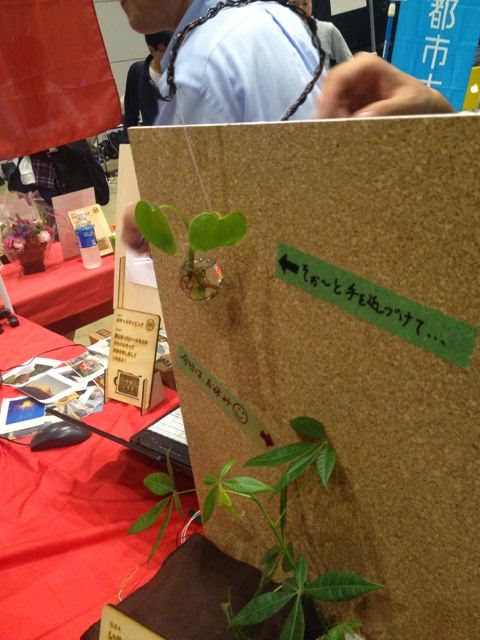
観葉植物と水自体を静電センサとして、人が近づいた事を感知する。
かわゆいので、女の子にうけてました。
An Capacitive sensor using a plant.

ルンバロボット。
ルンバはAPIを公開しているので、無改造でハッキング出来るそうです。
A communication protocol of RUNBA isn't a secret.It's easy to hacking.

そして、閉場時間が過ぎても中々帰らない人達+自分。
When it was closure time, people have not returned yet. And i.

今年もとっても楽しい時間を過ごす事が出来ました。
I spent very fun time.

Evernote はあなたがすべてを記憶し、手間をかけずに整理できるようにお手伝いします。Evernote をダウンロードする

8pinoの詳細 Details of 8Pino.

8pinoの詳細について調べてみました。
Arduino超初心者なので、かなり的外れな解説になっている可能性大です。
I collected information on 8pino.
I use Arduino for the 1st time.
So, There is a possibility that this information is wrong.

1.Compatible with Adafruit Trinket
 Adafruitというのは、米国の電子部品通販業者で、日本では秋月みたいなとこなんでしょう。
 Trinketというのは、その会社が去年発売したとっても小さなArduino互換基板です。
 そして、この8pinoは、日本のVITROというユニットが作った、Trinketとほぼ同じ回路でありながらサイズを更に小さくしたものです。
 従って、ソフトウエアやつながる周辺回路はTrinketとコンパチブルになる訳です。
Adafruit is electronic component mail-order traders in US. 
It is a company like AKIZUKI-TSUSHO in Japan.
Trinket is sold from Adafruit from last year. It's a very small compatible Arduino board.  
And, This 8pino is made of VITRO in Japan.It's a more small compatible Trinket board.
Then, 8pino can use software and hardware of Trinket.


2.Function of Trinket
 Trinketの大まかな機能を見てみましょう。詳しい事は、Trinketのページを見てください。
  • 電源電圧は3.3V。8MHz。8KのフラッシュROM
  • I/Oは5ピン。2つはUSBポートとシェア。3ポートは独立。1アナログ入力と2PWM出力。2つのシェアポートもアナログ入力とPMW出力に使う事も出来る。
  • だけど、シリアルポートモニター機能は有していない。
  • USB3.0ポートでは動かないらしい。
  • 電源の赤LEDと#1ポートの緑LED(8pinoは白色)
  • リセットボタン付き(8pinoは未実装)
  • I2C/SPIにも対応。
  • 取り付け穴付き!イエー!(8pinoは無し)
  • ほんとに小ちゃい(8pinoはもっと小さい)

The function of Trinket is as follows. See Trinket's web site.
  • ATtiny85 on-board, 8K of flash, 512 byte of SRAM, 512 bytes of EEPROM
  • 5 GPIO - 2 shared with the USB interface. The 3 independent IO pins have 1 analog input and 2 PWM output as well. The 2 shared IO pins have 2 more analog inputs and one more PWM output.
  • Trinket does not have a Serial port connection for debugging so the serial port monitor will not be able to send/receive data.
  • Some computers' USB v3 ports don't recognize the Trinket's bootloader. Simply use a USB v2 port or a USB hub in between.
  • On-board green power LED and red pin #1 LED (8pino had two white LED.)
  • Reset button for entering the bootloader or restarting the program. No need to unplug/replug the board every time you want to reset or update!
  • Hardware I2C / SPI capability for breakout & sensor interfacing.
  • Mounting holes! Yeah! (8pino does not have it.)
  • Really really small(8pino is more small.)

3.Detail of Trinket (and 8pino)

さて、Trinket(8pino)の詳細を見ていきましょう。
あくまでArduino互換として動くので、ATTiny85のCPU機能を全て使えるわけではありません。例えば、#5リセットピンはアセンブラを使えば汎用ポートになるはずですが、Arduninoとして使う場合は、リセットピンとして固定されています。(と思います。)
The detail of Trinket(8pino) are as follows.
Trinket(8pino) is Arduino compatible. Therefore the function of ATTiny85 can't be used completely.
For example Port5 is fixed on RESET function ,probably.


Item/port
機能
Function
Power LED
電源(VCC=3.3V)に接続されています。
Connected to VCC(3.3V)
LED
ポート1(#1)に接続されています。
Connected to #1
#0 PWM0/MOSI/SDA
GPIO 0
PWMポート0 
MOSI(マスターアウト,スレーブイン) 
SDA(シリアルデータ)
GPIO 0
PWM port 0 
MOSI(Master out Slave in) 
SDA(Serial Data)
#1 PWM1/MISO/LED
GPIO 1
PWMポート1
MISO(マスターイン、スレーブアウト)
白色LED
GPIO 1
PWM port 2
MISO(Master in Slave out)
White LED
#2 A1/SCK/SCL
GPIO 2
アナログ入力1
SCK(シリアルクロック)
SCL(シリアルクロック)
GPIO 2
Analog input 1
SCK(Serial Clock)
SCL(Serial Clock)
#3 USB/A3
GPIO 3
アナログ入力3
GPIO 3
Analog input 3
#4 PWM4/USB/A2
GPIO 4
PWMポート4
USBポート
アナログ入力2
GPIO 4
PWM port 4
USB port
Analog input 2
#5 Reset
リセット
Reset

4.Relation with Arduino functions.
各機能と主なArduino命令との対応を見てみます。
まだ実機で確認したわけではありませんので,多分間違いがあります。
特に、PWM、toneなどタイマーを使う物は併用ができなかったり、使用するポートが限られているはずです。
Each function and the relation with the Arduino functions are as follows.
But, I'm not testing it's functions. Therefore there is a possibility thet the following information is wrong.
For example the function using the timer shouldn't function at the same time. 

関数 Functions
機能
Action
pinMode(pin,mode)
GPIO(#0〜4)の入出力、プルアップ抵抗のモードを決定します。
Select for input/output in GPIO port.

digitalWrite(pin,value)
GPIO(#0〜4)に出力
Output a value to the GPIO port.
digitalRead(pin)
GPIO(#0〜4)から入力
Input a value for the GPIO port.
analogRead(pin)
A1〜A3からアナログ電圧を入力
Input a analog voltage for the Analog port.
analogWrite(pin,value)
PWM0,1,4からPWM波形を出力
Output PWM wave to PWM port.
tone(pin,frequency)
トーン信号(矩形波)を出力
Output square wave output GPIO port.
pulseIn(pin,value,timeout)
パルス幅を計測します。
Measurement of pulse width.
SPI.xxx
SPI(シリアルペリフェラルインターフェース)関係の関数郡です。
SPI's functions.
Wire.xxx
I2C(アイスクエアシーバス)関係の関数群です。
I2C's functions.


Evernote はあなたがすべてを記憶し、手間をかけずに整理できるようにお手伝いします。Evernote をダウンロードする

2014年11月24日月曜日

初めての8pino. My first 8PINO with Mac

Maker Faire TOKYO 20148pinoを買ってきました。
8pinoはもちろん、Arduinoも初めてです。
今から動かしてみます。うまく動いてくれるかな?
I bought "8pino" in Maker Faire TOKYO 2014.
I do the test run it.

1.About 8pino
 8pinoは小ちゃなArduino互換品です。
 CPUはアトメルのATTiny85です。
   そればっかじゃありませんでした。この製品グッドデザイン賞を受賞しているじゃないですか!凄い!
 8pino is small Arduino compatible CPU board.
 CPU is ATMEL ATTiny .
 And,This product was awarded the Good Design Award 2014.
  It's amazing. 
 
 大きさはこのくらいです。:)
 The size is very small like the following photograph. 
 マイクロUSBにはこんな感じで差し込みます。
 It connect with a micro USB cable like the following photograph. 

2.Download IDE.
 以下のサイトからTrinket用のIDEをダウンロードし、ダブルクリックして解凍します。
 解凍されたアプリケーションをアプリケーションフォルダに移動します。
 Downlord IDE from the following sites and unzipped.
 Move unzipped application to application folder.

3.Install Java SE 6 runtime.
アプリケションフォルダーに移動したAdafruit Arduino 1.0.5 をクリックして起動すると、以下のダイアログが表示されますのでインストールを押します。
When launching IDE ,this dialog displayed.
Then, please push INSTALL button.
OKを押します。
And, push OK button.
4.Release of security
 Adafruit Arduino 1.0.5を起動すると、セキュリティの関係で開けない事があります。
 When launching IDE ,this dialog displayed. 
 システム環境設定 -> セキュリティとプライバシー で設定をします。
 Please choose System -> Security and Privacy.
 
 鍵のロックを外し、全てのアプリケーションを許可にチェックを入れます。
 Unlock the key icon ,then check "All application permission" button.

 全てのアプリケーションを許可を押します。
 Click "All application permission".


5.Run the IDE
 再び、IDEを起動します。新しいスケッチが立ち上がります。
 このスケッチというのは、要するにプログラムの事です。
 Run the IDE.The new sketch window are opened.
 The SKETCH meaning program code.


プログラム(スケッチ)を書く前に設定をします。
ツール -> マイコンボード -> Adafruit Trinket 8MHzを選択します。
Before you write program code you must be setting the tools.
Choose menu bar from Tools,CPU board,and Adafruit Trinket 8MHz.

 続いて、
 ツール -> 書込装置 -> USBtinyISPを選択します。
 Next,choose menu bar from tools,Writer,and USBtinyISP.

Lチカをするにはプログラム(スケッチと言うのがまだなじめない)が必要です。
http://8pino.cc/ にLチカプログラムがありました。
このプログラムをコピーして、IDEのスケッチエリアに貼付けます。
When you want to blink LED you must write the sketch.
Copy the program from this site. http://8pino.cc/
Paste the program to sketch's area.

6.Blinking the LED
 いよいよLチカです。
 USBケーブルをMacに繋いで、"マイコンボードに書き込む"ボタンを押します。
 Connect the USB cable to MAC.
 Next,click the "Write the CPU board".
  
  あれ?エラーだ。
 The error occured.Could not find USBTiny device.

 USBケーブルを刺し直しても、別のエラーが発生。初期不良か?
 when I reconnect the cable,other errer occured.

エラーの原因はUSBケーブルの差し込むタイミングでした。

USBケーブルを差し込んだ直後に、書き込みを行えば正常に動作しました。
Cause of the error is a timing to connect the cable.
Please press the upload button immediately after inserting the cable.

Lチカ
Blinking LED.

うーん。これはいい。10個ぐらい買って、何か作りたくなってきた。
Arduinoは開発が手軽でいいですね。 
This is very good product.I would like to make something using this.
And, Arduino is easy for programing.

Evernote はあなたがすべてを記憶し、手間をかけずに整理できるようにお手伝いします。Evernote をダウンロードする

2014年11月3日月曜日

20141102 国立音楽大学芸術祭2014 FESTIVA DELLA MUSICA in Kunitachi college of music

国立音大の芸術祭に始めて行ってきました。
午前中は大ホールで吹奏楽の鑑賞。やっぱ大学生ともなるとうまいですね。
I went to the FESTIVA DELLA MUSICA in Kunitachi college of music ,yesterday.
I listened wind instrument music in main hall at morning. 
Performance of College students is very good. I like it.

午後は、ジャズ喫茶でまったり。みんな自分の世界にどっぷりって感じで実に素敵。
明日は、山下洋輔が来るんだって。残念、明日にすればよかったー。
In afternoon,I went JAZZ tea room.I was relaxed.
Players made original world.It's  fantastic.
By the way, Yamashita Yousuke coming here tomorrow.
I would be glad if he came today.

お昼は焼きそばと
I have a lunch.It's YAKISOBA(Fried noodles),

おでん。
,and ODEN(Japanese pot-au-feu).

コスプレのみんなもかわいかったよー。
A costume player of girls was cute everybody. 


Evernote はあなたがすべてを記憶し、手間をかけずに整理できるようにお手伝いします。Evernote をダウンロードする