今から動かしてみます。うまく動いてくれるかな?
I bought "8pino" in Maker Faire TOKYO 2014.
I do the test run it.
1.About 8pino
8pinoは小ちゃなArduino互換品です。
CPUはアトメルのATTiny85です。
そればっかじゃありませんでした。この製品グッドデザイン賞を受賞しているじゃないですか!凄い!
そればっかじゃありませんでした。この製品グッドデザイン賞を受賞しているじゃないですか!凄い!
8pino is small Arduino compatible CPU board.
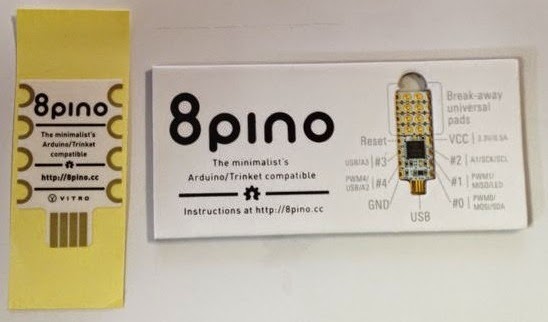
大きさはこのくらいです。:)
The size is very small like the following photograph.

マイクロUSBにはこんな感じで差し込みます。
It connect with a micro USB cable like the following photograph.

2.Download IDE.
以下のサイトからTrinket用のIDEをダウンロードし、ダブルクリックして解凍します。
解凍されたアプリケーションをアプリケーションフォルダに移動します。
Downlord IDE from the following sites and unzipped.
Move unzipped application to application folder.

3.Install Java SE 6 runtime.
アプリケションフォルダーに移動したAdafruit Arduino 1.0.5 をクリックして起動すると、以下のダイアログが表示されますのでインストールを押します。
When launching IDE ,this dialog displayed.
Then, please push INSTALL button.

OKを押します。
And, push OK button.

4.Release of security
Adafruit Arduino 1.0.5を起動すると、セキュリティの関係で開けない事があります。
When launching IDE ,this dialog displayed.

システム環境設定 -> セキュリティとプライバシー で設定をします。
Please choose System -> Security and Privacy.

鍵のロックを外し、全てのアプリケーションを許可にチェックを入れます。
Unlock the key icon ,then check "All application permission" button.

全てのアプリケーションを許可を押します。
Click "All application permission".

5.Run the IDE
再び、IDEを起動します。新しいスケッチが立ち上がります。
このスケッチというのは、要するにプログラムの事です。
Run the IDE.The new sketch window are opened.
The SKETCH meaning program code.

プログラム(スケッチ)を書く前に設定をします。
ツール -> マイコンボード -> Adafruit Trinket 8MHzを選択します。
Before you write program code you must be setting the tools.
Choose menu bar from Tools,CPU board,and Adafruit Trinket 8MHz.

続いて、
ツール -> 書込装置 -> USBtinyISPを選択します。
Next,choose menu bar from tools,Writer,and USBtinyISP.

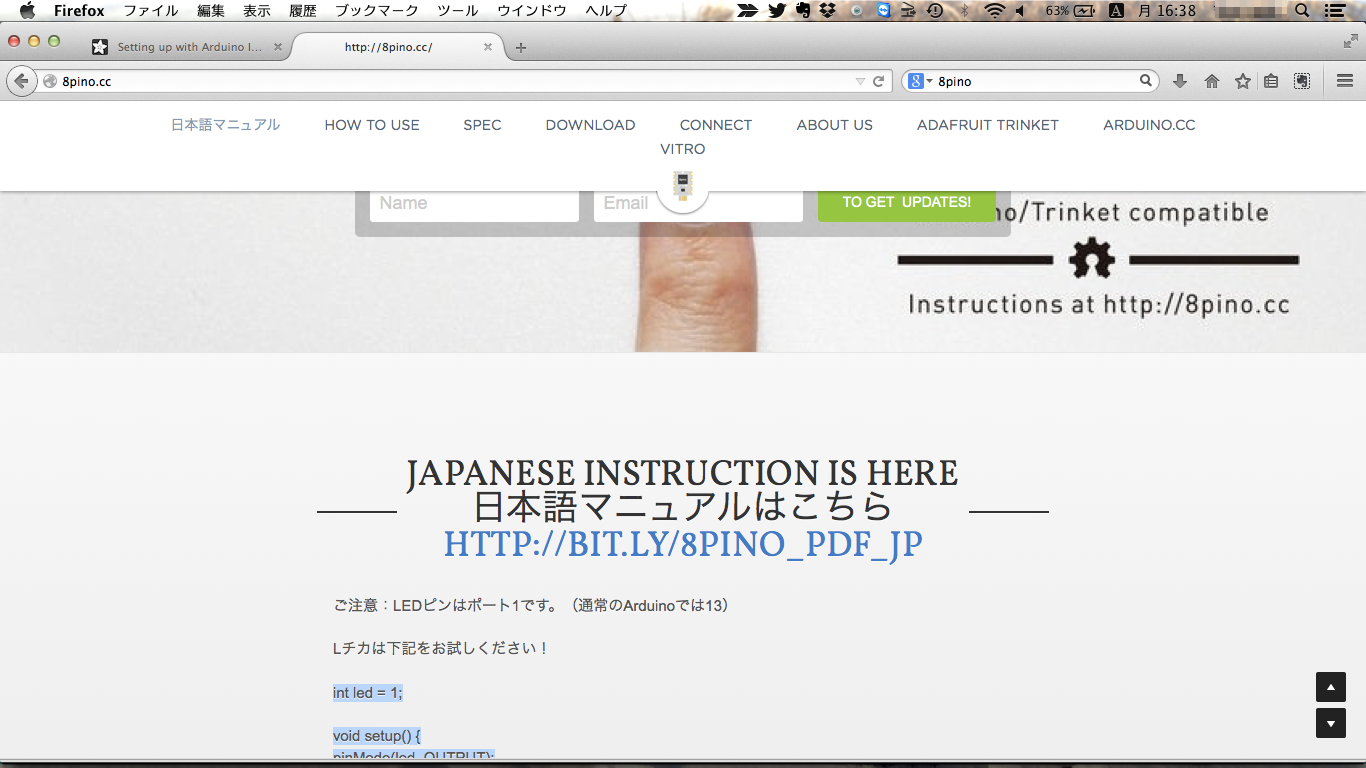
Lチカをするにはプログラム(スケッチと言うのがまだなじめない)が必要です。
http://8pino.cc/ にLチカプログラムがありました。
このプログラムをコピーして、IDEのスケッチエリアに貼付けます。
When you want to blink LED you must write the sketch.
Copy the program from this site. http://8pino.cc/
Paste the program to sketch's area.
6.Blinking the LED
いよいよLチカです。
USBケーブルをMacに繋いで、"マイコンボードに書き込む"ボタンを押します。
Connect the USB cable to MAC.
Next,click the "Write the CPU board".
あれ?エラーだ。
The error occured.Could not find USBTiny device.

あれ?エラーだ。
The error occured.Could not find USBTiny device.
USBケーブルを刺し直しても、別のエラーが発生。初期不良か?
when I reconnect the cable,other errer occured.

エラーの原因はUSBケーブルの差し込むタイミングでした。
USBケーブルを差し込んだ直後に、書き込みを行えば正常に動作しました。
Cause of the error is a timing to connect the cable.
Please press the upload button immediately after inserting the cable.

Lチカ
Blinking LED.
うーん。これはいい。10個ぐらい買って、何か作りたくなってきた。
Arduinoは開発が手軽でいいですね。
This is very good product.I would like to make something using this.
And, Arduino is easy for programing.
うーん。これはいい。10個ぐらい買って、何か作りたくなってきた。
Arduinoは開発が手軽でいいですね。
This is very good product.I would like to make something using this.
And, Arduino is easy for programing.

| Evernote はあなたがすべてを記憶し、手間をかけずに整理できるようにお手伝いします。Evernote をダウンロードする |
0 件のコメント:
コメントを投稿
コメントをどうぞ